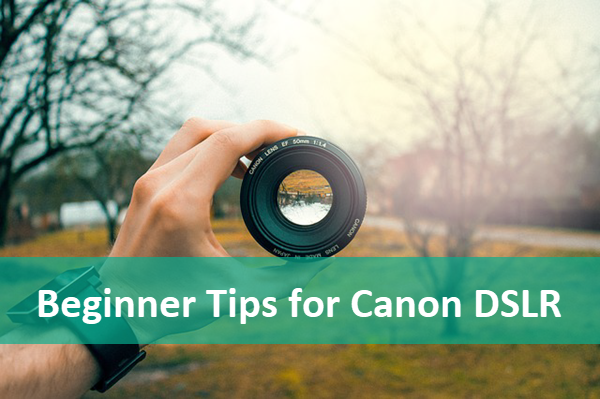
40 Tips About Photography for Canon DSLR Camera Beginners
With the popularity of smartphones, it seems to be redundant to learn how to use any digital devices, especially digital cameras which appeared earlier than our mobile phones. However, the thing turns out that camera beginners, or even senior amateurs, are usually unaware of the easy yet very handy tips and tricks in this article. Want to shoot like an expert in the shortest time? Don’t miss the following 40 Canon photography tips for beginners. It won’t hurt to glance over even you are a long-year DSLR camera user.
1) Saving on Space
In case you forgot of your spare card and your space is running low, use the high-quality JPEG settings as your camera will keep firing for longer.
2) Firmware Updates
Canon regularly releases updates of firmware, and therefore regular checking is recommended. To do this check on which version you are using, log into Canon’s website and search whether there are any firmware updates.
3) Make Most of the Live View
This feature helps you use the LCD to frame shoot and especially when the canon camera is on a tripod. The live view is found on the recent models where there is now a dedicated switch to activate it on the camera body. This feature allows you to see what the camera sees on its screen.
4) Try sRaw
Many models that can shoot JPEG and raw files have the sRaw. This feature helps in minimizing the card space while offering many raw benefits. However, it uses fewer pixels making it difficult to produce high quality and resolution.
5) Select RAW Image Settings
It gives the best range of tones and provides better flexibility when editing with software. If you’re not a keen user of Canon official photo viewer/editor, however, it will be a problem to view RAW image thumbnails in Windows free. Most digital cameras allow JPEG + RAW mode, but it may take extra time for burst shooting.
6) Adjusting the Diopter
Diopter helps in making the images clearer. This is made possible by adjusting the viewfinder your eye and then the optics inside. Turn the viewfinder looking at the clarity of the numbers and not the images themselves.
7) Adobe RGB
It is found on the menu under the color space option. There are two options under the color space is the sRGB and the Adobe RGB. The Adobe RGB is preferable as it gives a broader range of colors during printing.
8) Formatting or Erasing
After downloading your photos to a storage device, like computer drive, it is necessary to free up the card for the next shoot. There are two options for the purpose: Delete all or Format. The first option will remove all the pictures except those protected or locked, while the Format option removes all of them, including those locked or protected.
It will not be a problem if you have backed up all the photos and videos well. Otherwise, you will need to use the best photo recovery software to recover deleted Canon photos and videos immediately.


9) Regulation of Sounds
There is always a focusing confirmation sound that is usually on by default. If you don’t like these sounds or they are scaring away the animals that you are capturing, then consider turning it off.
10) Save Your Shot
Switch the shoot W/O Card option to off. It is more liable when taking pictures without a memory card.
11) Using of Picture Styles
To use the picture style, one has to adjust the camera into the right mode. It gives one an accurate preview by helping you visualize on how the picture will look once processed in the computer.
12) Program Shift
The P or program mode is a powerful feature that helps you set the aperture and shutter speed. This depends on your lens and the light level. Here, you can change the aperture or shutter speed as you use it.
13) Experimenting the Picture Styles
Canon DSLR gives users a lot of choices for the subjects that are best for white and black conversion use, the monochrome picture style. The shoots in raw and the images will, however, remain recorded in color.
14) Customizing the Picture Styles
It is not always a must that you use the picture styles in their current looks. You can adjust them to suit your pictures. For instance, when using the saturation and contrast, you can change them while in the monochrome you can add filter effects and tone.
15) Av Appeal
This setting helps you in taking creative photos. The aperture is set using the main dial, and the camera sets the shutter speed considering the exposure compensation and metering mode that you have set.
16) AV for Speed
The Av mode is useful for setting the aperture ad the shutter speed. Top shutter speed is achieved by widening the aperture and vice-versa.
17) How to Adjust Exposure
With most popular EOS models, you press the Av + or – button and then rotating the main dial behind the shutter. A positive setting makes the picture lighter, and the negative one makes it darker.
18) Setting Exposure Compensation
When the scene is predominantly of a light scene or is white, set an exposure compensation to+1 or +2 for a right balance and when in a black scene, the camera tends to overexpose the shot and therefore a negative setting is needed.
19) Use of the Partial Metering
To avoid a shot from appearing as shadowy silhouettes, exposure compensation is used. Switching the metering mode could also be another option as it measures the brightness from the center of the screen.
20) Focus Lock
Focus Lock gets the autofocus (AF) to focus on a specific part of a scene.
21) AE Lock
The disadvantage of the focus lock is that it can lead to inaccurate exposure. To avoid this, before firing use the exposure lock button to reset the exposure.
22) Use the Automatic Depth of Field
It enhances the sharpness of all the key areas. The AF buttons must be switched when using it.
23) A-DEP Tips
Half press the trigger until it uses all the focus point required rather than only those that it can focus straight at.
24) Trying the Manual Focus
Switch the lens to MF from AF, then turn the focus ring on the lens until it looks sharp in the view field.
25) Focus Check
Severally press the magnifying glass to zoom into your shot to check on different areas by using the cursors controls.
26) Predictive Autofocus
Switch to the AI Servo mode as the one-shot autofocus helps in capturing moving objects.it is a perfect feature to use during action events.
27) Using the Fill-in Flash
Adjust your camera to Av mode and then use the flash. It helps can not only be used in the dark but also during daylight.
28) High-speed Sync
It enables one use flash at any shutter speed. It is also useful with the fill flash as it enables it to use your lens widest aperture to blur the background.
29) Flash Exposure Compensation
Flash is at time empowering on shots. Set your flash exposure compensation accordingly.
30) Using the Bulb
Switch to manual exposure mode to get bulb or B mode. It is used when you want exposures for more than 30 seconds.
31) Mirror Lockup
It is found in the custom function and ensures that the mirror is well raised minimizing even the tiniest vibrations.
32) Using the Self-timer
It cuts out the camera vibrations when taking long exposure shots with the tripod. Using the mirror lock-up and the self-timer reduces the delay.
33) Slideshows
Set the AutoPlay option in your camera’s menu to play back all the pictures on your card. You can then delete or correct the faulty ones.
34) Auto Lighting Optimizer
It automatically adjusts the contrast of images and rescues the shadow details. It makes low- contrast appear punchier and detects underexposing.
35) Auto Exposure Bracketing (AEB)
It enables you to shoot a set of three pictures at different exposures. Ensure that each of the shots is one stop apart.
36) Using Highlight Tone Priority
This is a new custom function feature in the new models. It enables you to get more tonal range from the brightest areas of your picture.
37) Lock Your Shots
It safeguards your shots and stops them from being erased with the Delete All command.
38) Use the Q Menu Shortcut
For quick access to the main menu use this button as it gives you a good overview of your main settings and also gives saves on time.
39) Set Date and Time
Ensure setting of correct date and time to make it easier for you to trace the images when cataloguing the photos later. Nevertheless, you may need to consider how to copy files without changing the date stamp if you want to organize the photos after downloading to computer.
40) Back to Default
Don’t worry about messing up the settings of your Canon DSLR cameras. To set back to DSLR’s fresh settings, use the Clear all camera settings in the menu. Surely, it’s always recommended to backup SD card data before performing formatting or clearing.
Conclusion
In this article, we have learnt a total of 40 useful tips about photography, which are based on Canon DSLR but also helpful for mastering digital cameras of other brands, either Sony, Nikon or Fujifilm. If you have any questions or suggestions about Canon photography beginner tips, kindly share with us in the comment.
