iReparo for Android User Guide
Are you suffering from data loss on Android phone or tablets? If yes, iReparo for Android will be your good helper. This recovery software can recover up to 9 different types of data, namely contacts, call history, messages, gallery, videos, audios, documents, WhatsApp, Viber.


What Devices Are Supported?
Almost all Android phones and tablets are compatible with this software, especially the most popular ones like Samsung, HTC, Huawei, Sony, LG, Motorola, Google, etc. Most importantly, this software even supports the newest Android version 8.1.
How to Recover Data on Android?
First of all, you have to make sure not to use your Android device once you lost data. Otherwise, the deleted/lost data will be overwritten by the new data you created, which will decrease the chance for Android file recovery. Then, you can download this software on your computer and use the iReparo for Android user guide below to recover what you want.
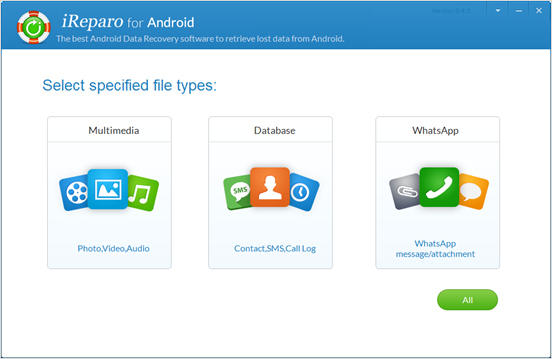
Step 1: Choose Data Type to Scan
Launch this software, you will see three different file types grouped in three boxes, you can choose one and tap the box to enter into the next step or click “All” to continue. Please note that if you choose a specified file type, it will be faster for you to get access to the data you want in the following steps.
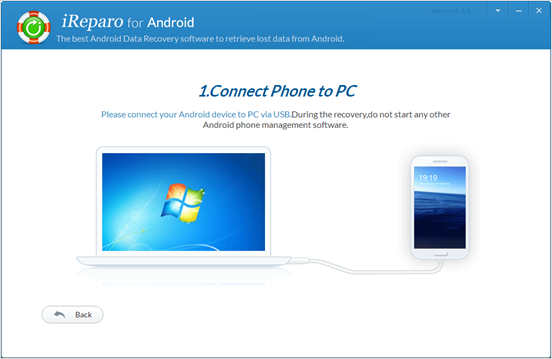
Step 2: Make Your Android device Connected to computer
Connect your Android device to computer according to the prompts on the software operation interface. During the process, you have to enable USB debugging on your Android and give authorization to the computer so that you can move to the next step.
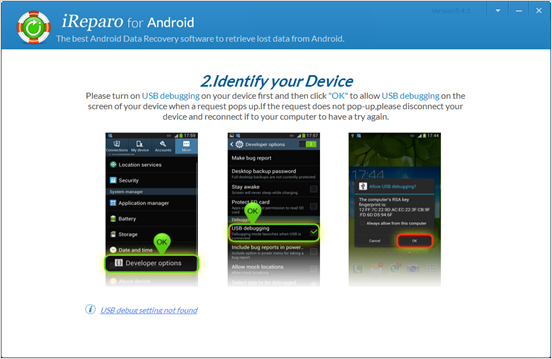
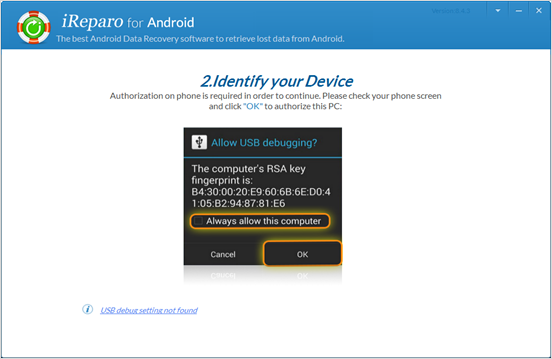
Note: If your device can’t be detected, you have to install a corresponding driver according to the software hints. Plus, you are supposed to root your device before the recovery.
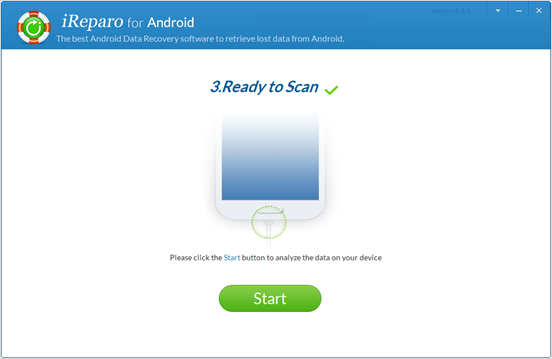
Step 3: Start to Scan Your Android
After your Android device is connected successfully, click “Start” to let the software scan the data type you have chosen. The scanning process will be longer if you choose “All” rather than one file type in the first step. In addition to data size, the whole process depends on your computer performance as well.
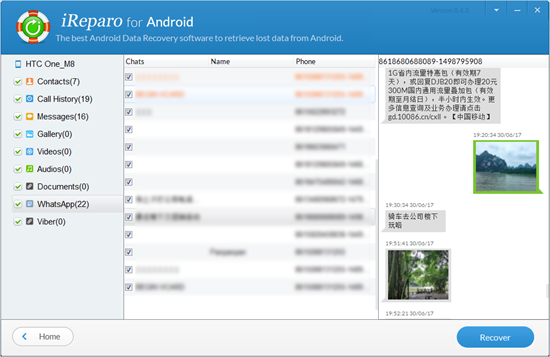
Step 4: Recover Specified Data You Want
Once the scanning process finishes, you can preview and select the scanned data you want and then click “Recover” to get the deleted/lost data back.